
Whether it is named a “yoga strap” or a yoga belt, this useful prop is widely available as a coloured cotton band with a D-ring attachment variation, or as a narrower, traditional Indian white cotton band. They both come in different widths and lengths.
You can use a yoga belt ‘open’ or buckled to form a small or large loop. It’s really important to learn how to buckle your belt properly, to prevent the buckle from shredding the belt, and to give a supportive grip.
If you’re choosing a yoga belt, you might find the narrower belts easier to use if you are a smaller person. The wider belts are useful if you have larger hands and longer arms. The standard-length belts are suitable for most people and most poses. However, if you are very tall, or need extra support for your legs or trunk in wider poses, an extra-long belt can be very useful.
A belt provides three main actions.
Touch sensation:
Using the yoga belt gives you feedback about where you are moving ‘from’ and ‘to’. For instance, when you have difficulty reaching your feet in forward bends, putting a belt round your feet helps to stabilise your legs, which in turn liberates your spine, helping to draw your trunk closer to your legs.
Holding the belt with your hands gives you the touch sensation of being able to catch your feet, which helps you develop the correct action in your legs and spine.
Resistance to help you extend or contract:
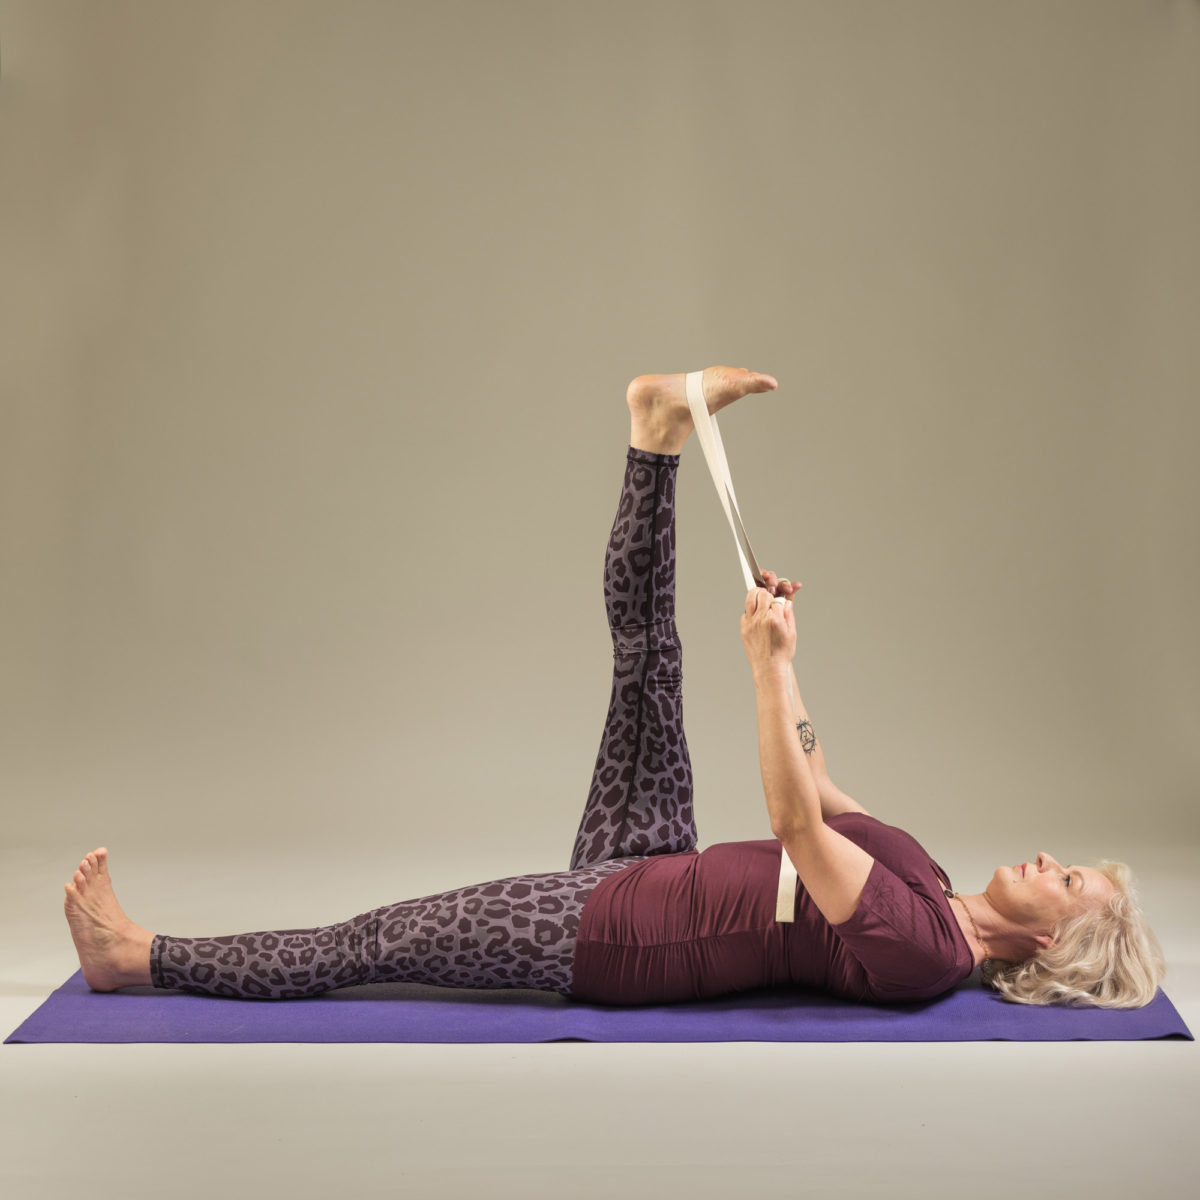
If you need to improve your leg extensions, such as in Supta Padangusthasana, the yoga belt provides resistance against which you can learn to develop an even extension of the whole limb.
Using the belt in different positions on the foot also changes the information received by the brain, for instance, a belt around the heel helps us to feel the action of the skeleton, whereas over the ball of the foot develops our awareness of the muscular action.
Support to maintain a steady action:
Sometimes we need to support the shoulders, for instance in Salamba Sarvangasana (Shoulder Balance) or Pincha Mayurasana (Elbow Balance).
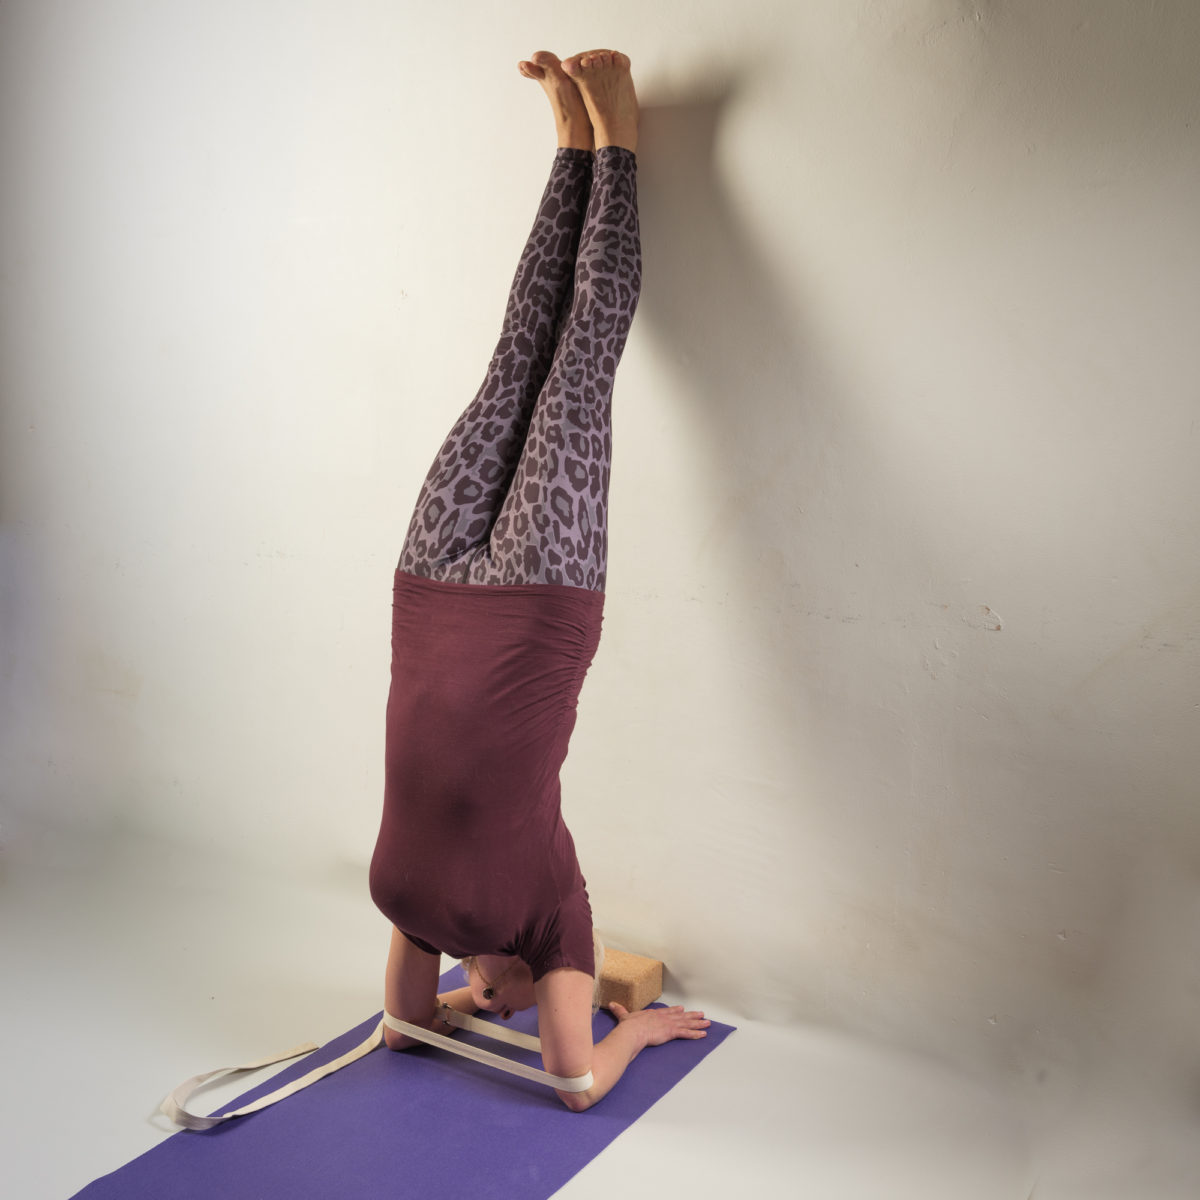
A belt tied around the elbows helps them to stay fixed, so they don’t splay out. When we need to learn how to grip our hips, a belt tied around the lowest part of the pelvis gives us the sensation of gripping and teaches us to mirror that action when we take the belt off. The longer belts can be very useful for stabilising your feet in very wide leg poses – be sure to have the belt right over the back edge of your foot, underneath the outer ankle bone.
Here are a couple of examples for you to try:
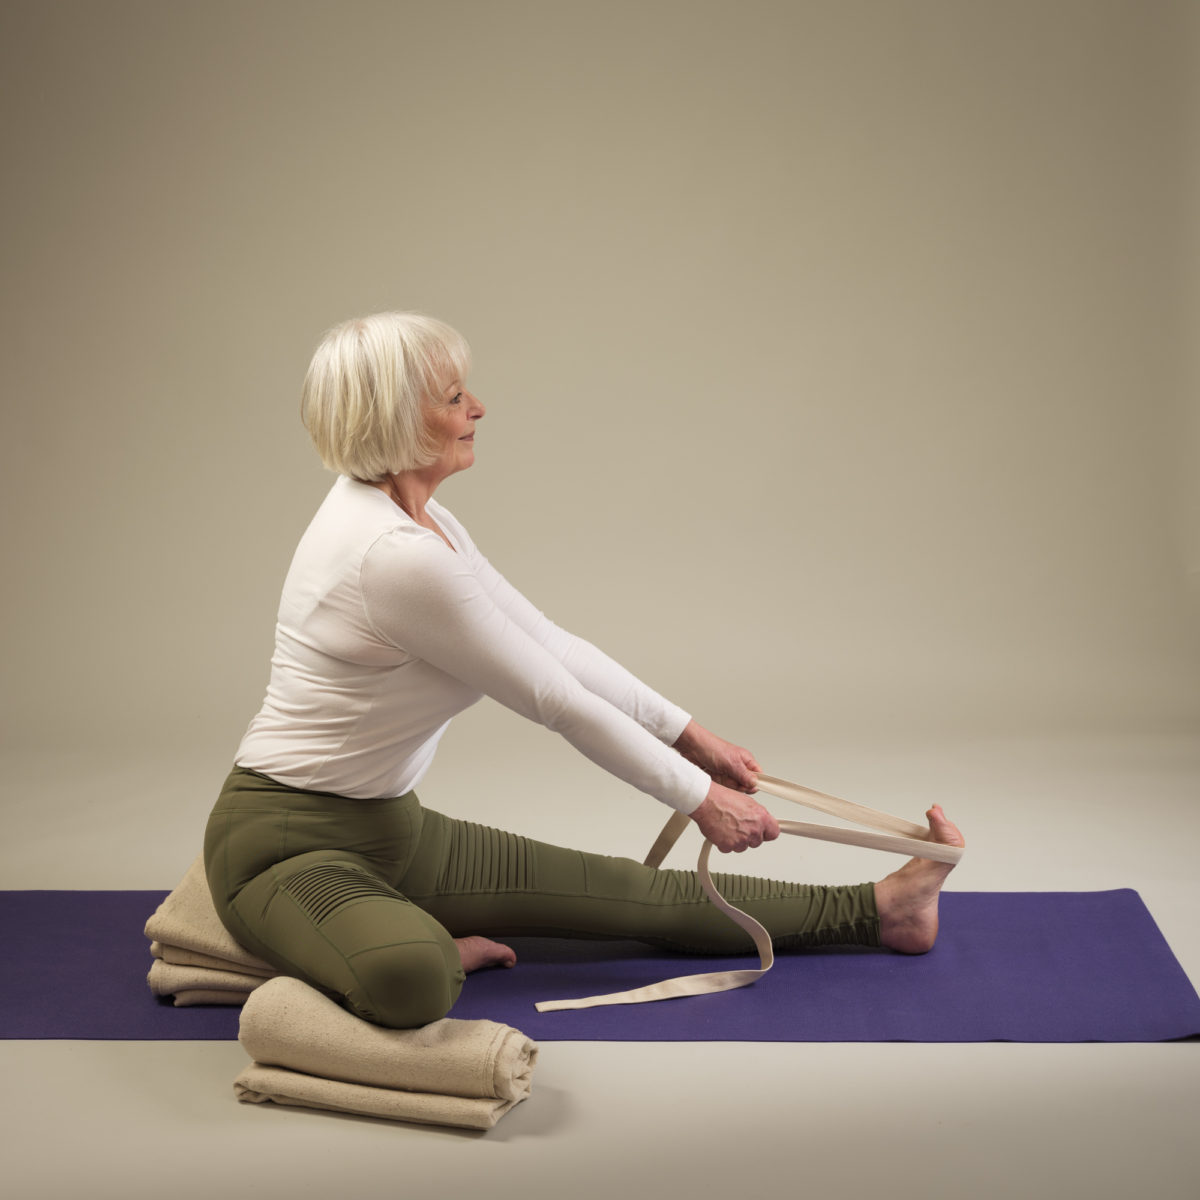
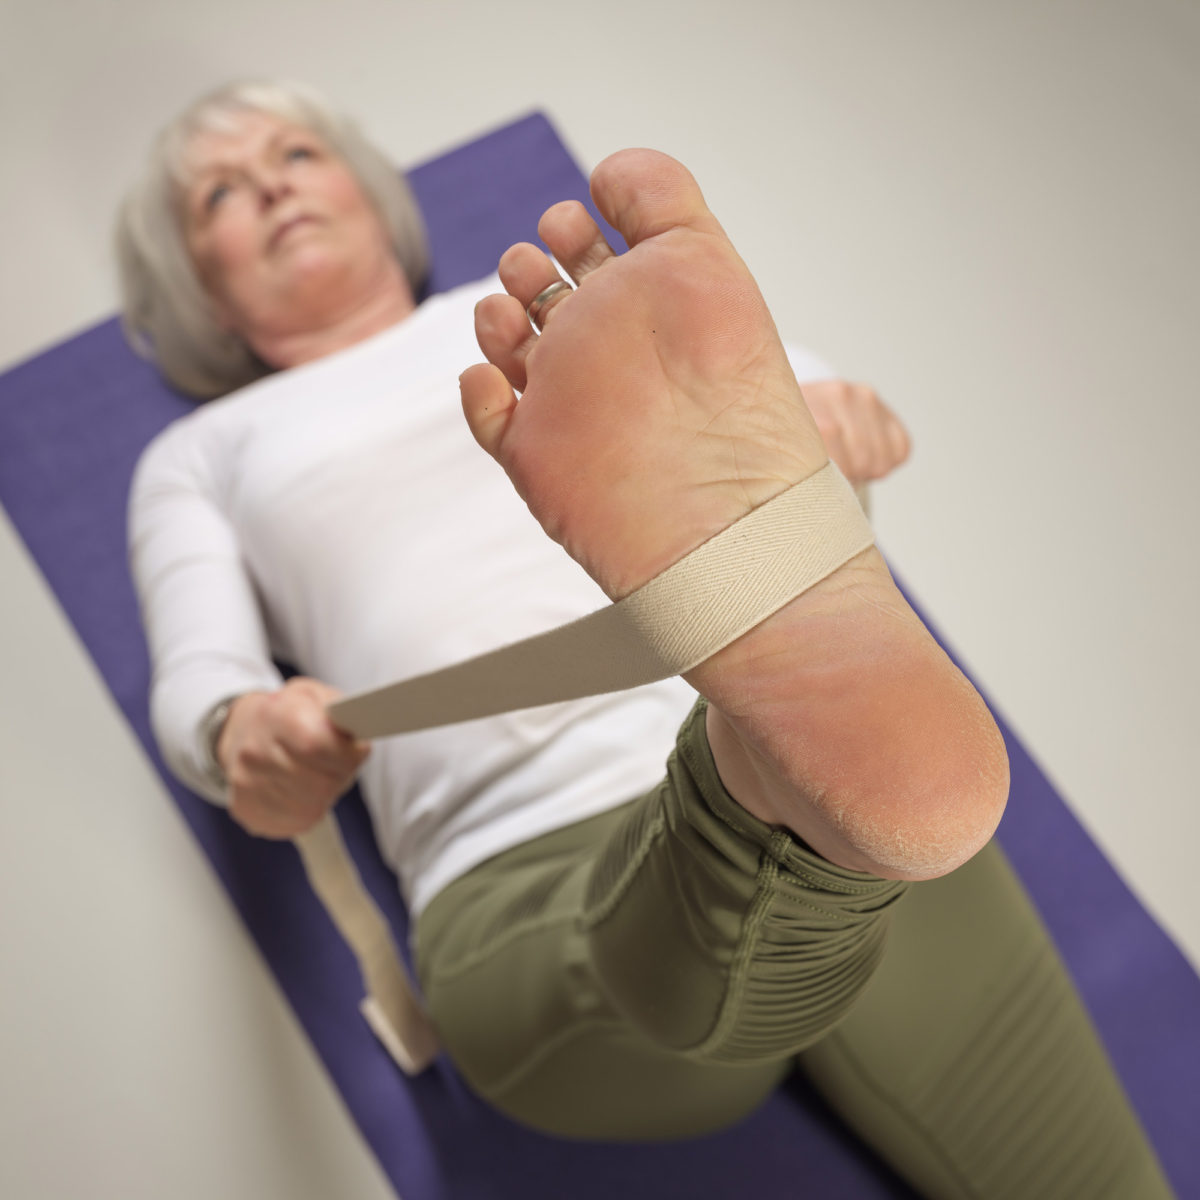
Supta Padangusthasana – Leg Extensions
Lying on your back on your yoga mat, explore using the belt to hold your foot, to provide resistance to push your foot into, to extend your leg more. Your arms are involved too: as they pull down, keep your shoulders actively pressing down and your chest open. (It’s important to hold the belt with hands apart, as shown, so that there can be space for the chest. The common mistake is to hold the belt with your hands unevenly positioned and your chest closed.)
Then explore three areas on the foot to hold the belt. This will extend the front and back of your leg in different ways. (Give yourself time to explore and repeat evenly on both sides.)
Position 1 – the belt on the roots of the toes.
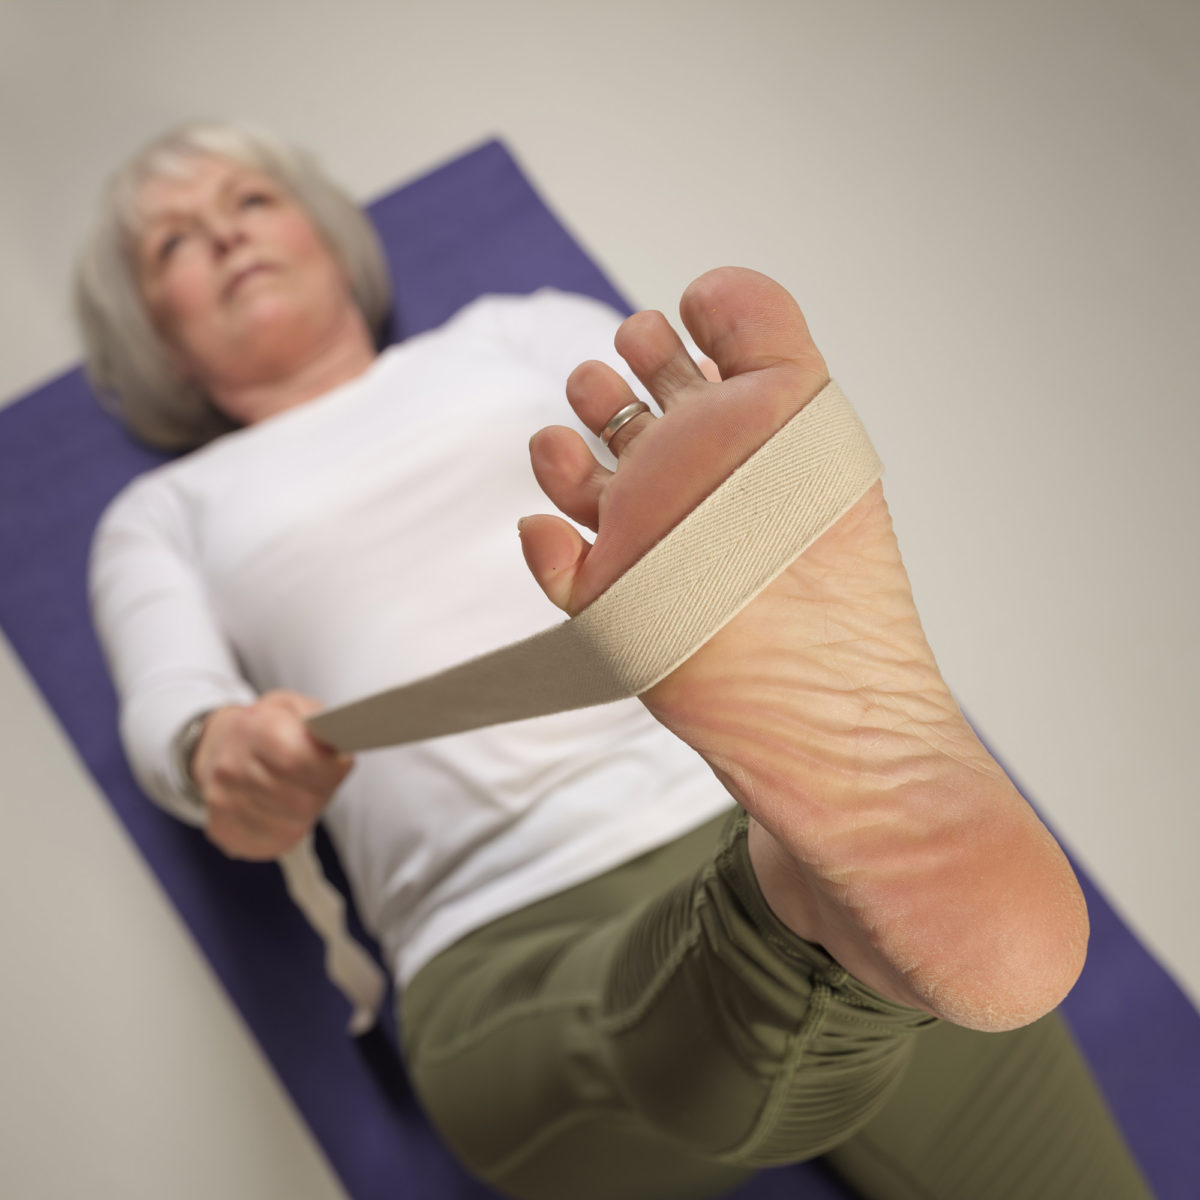
Angle the belt to cover your big toe joint to little toe joint. (Notice how it is set further back due to the shape of the foot.) When you pull down on this area, focus on extending the heel up in opposite resistance and you may experience a firm stretch in the calf muscle or back of the knee.
Position 2 – the belt on the very tip of the heel bone.

As you pull down here and resist your heel bone up into that pressure, you may observe the feeling of traction in the femur bone as if it’s drawing firmly down into the hip socket. (Excellent for people with hamstring injuries or lower back pain.)
Position 3 – with the belt in the centre of the arch.
Lift the arch of your foot into the belt whilst keeping your toes spread and heel extending. This involves lifting your whole foot as one and allows you to feel the connection between the actions of your foot and the reaction in your knee and groin.
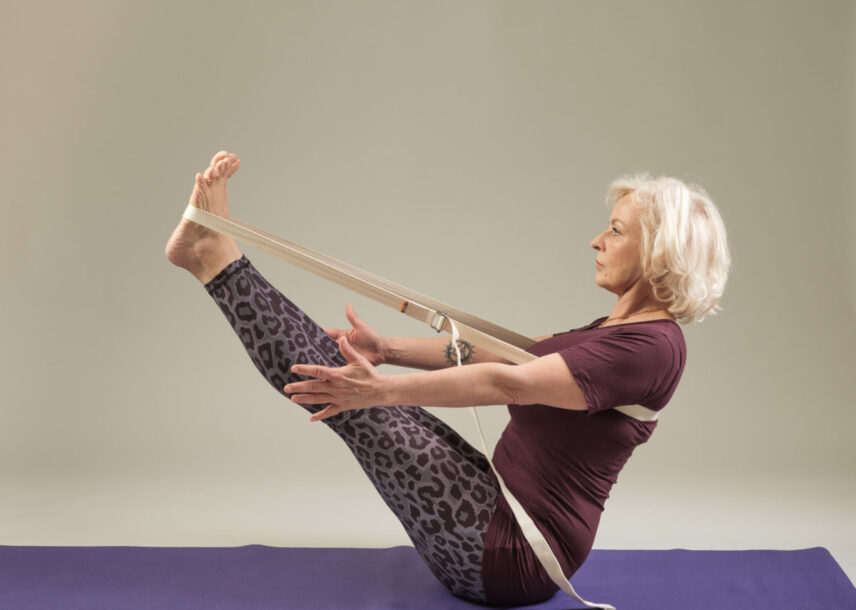
Navasana – Boat Pose.
This is a strong pose for those with weak lower backs and/or tight hamstrings, so we often teach this with a belt to help people develop the pose without strain.
Using an extra-long belt, place it behind your chest (near the armpits) and up and around your feet.
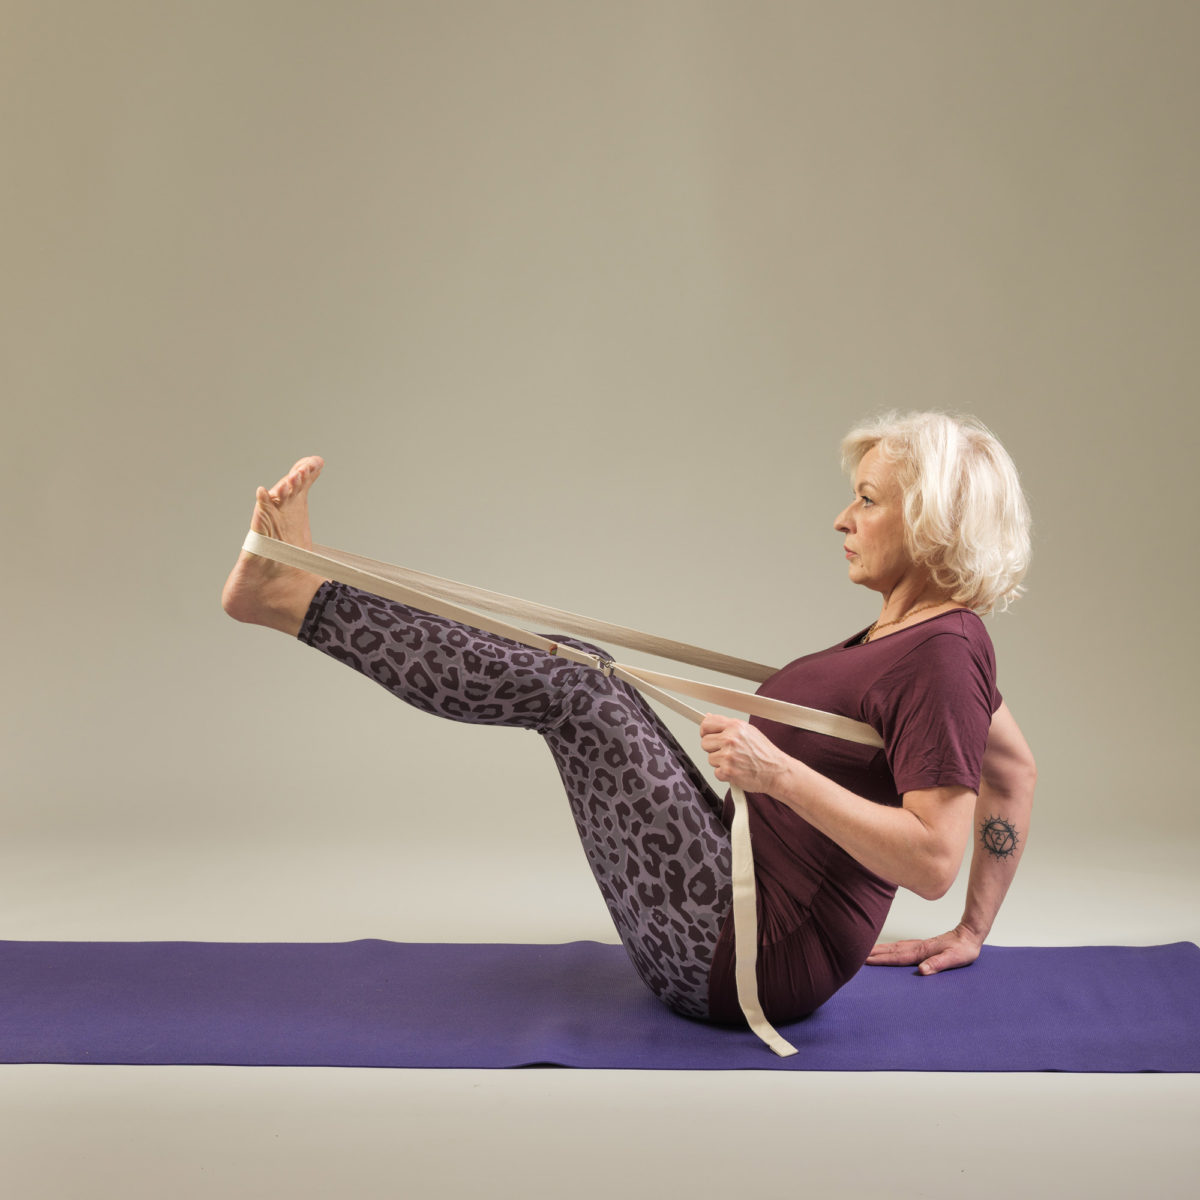
With your legs slightly bent, tighten the belt by pulling the tab downwards towards the floor. Then push your feet up into the belt to straighten your legs as much as you can, leaning back and balancing on your buttock bones.
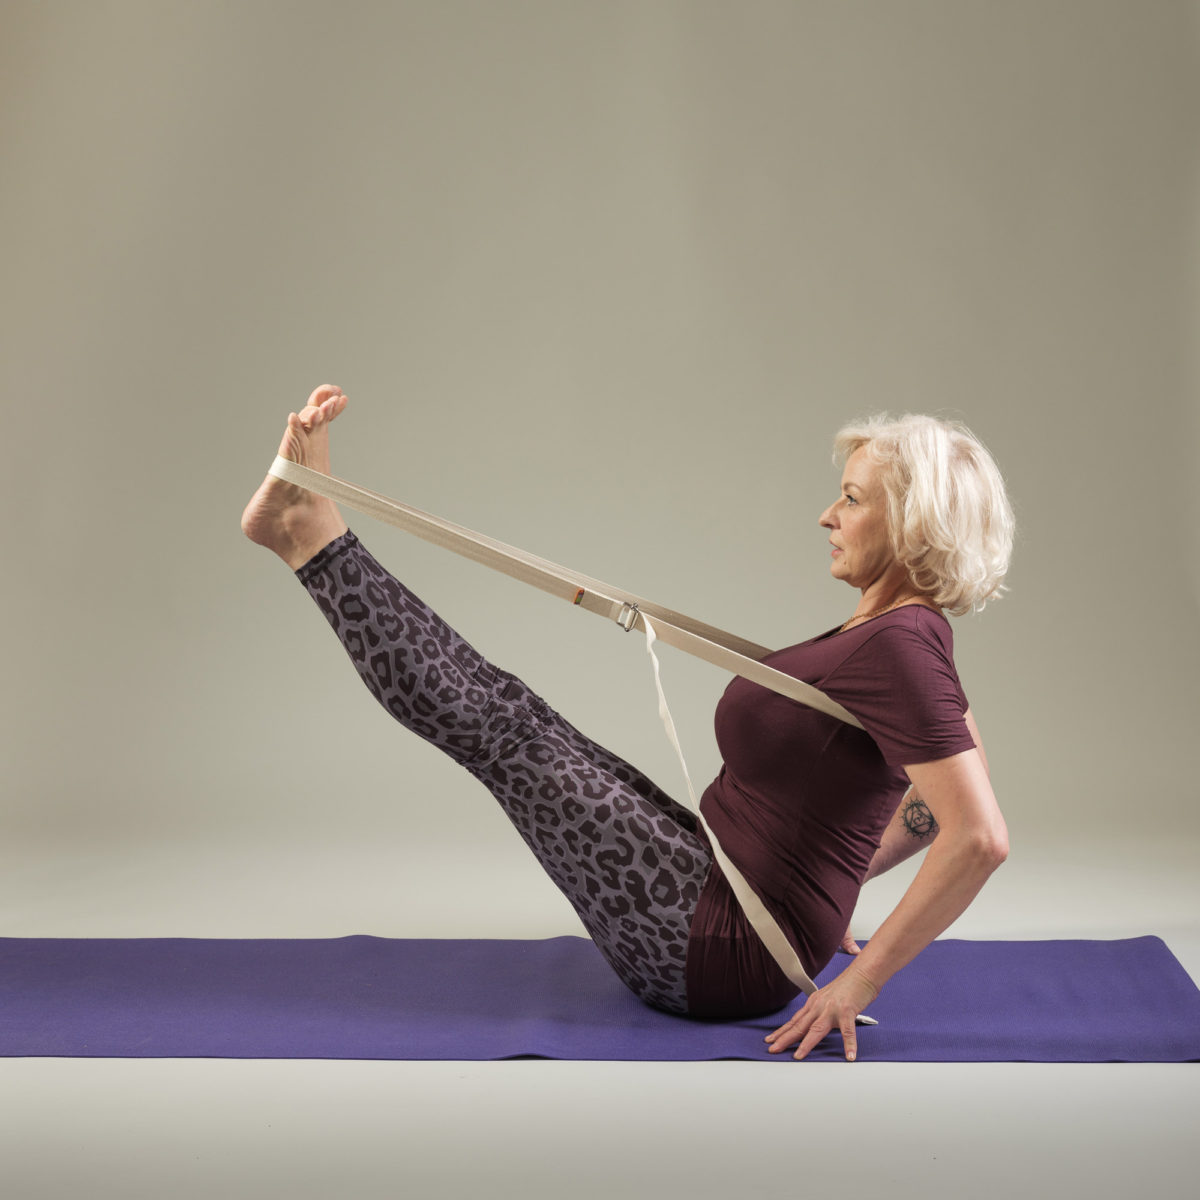
You can adjust the belt to suit your flexibility. Your knees should be in line with your shoulders, and when you extend your arms parallel to the floor, your palms will face the sides of your knees.
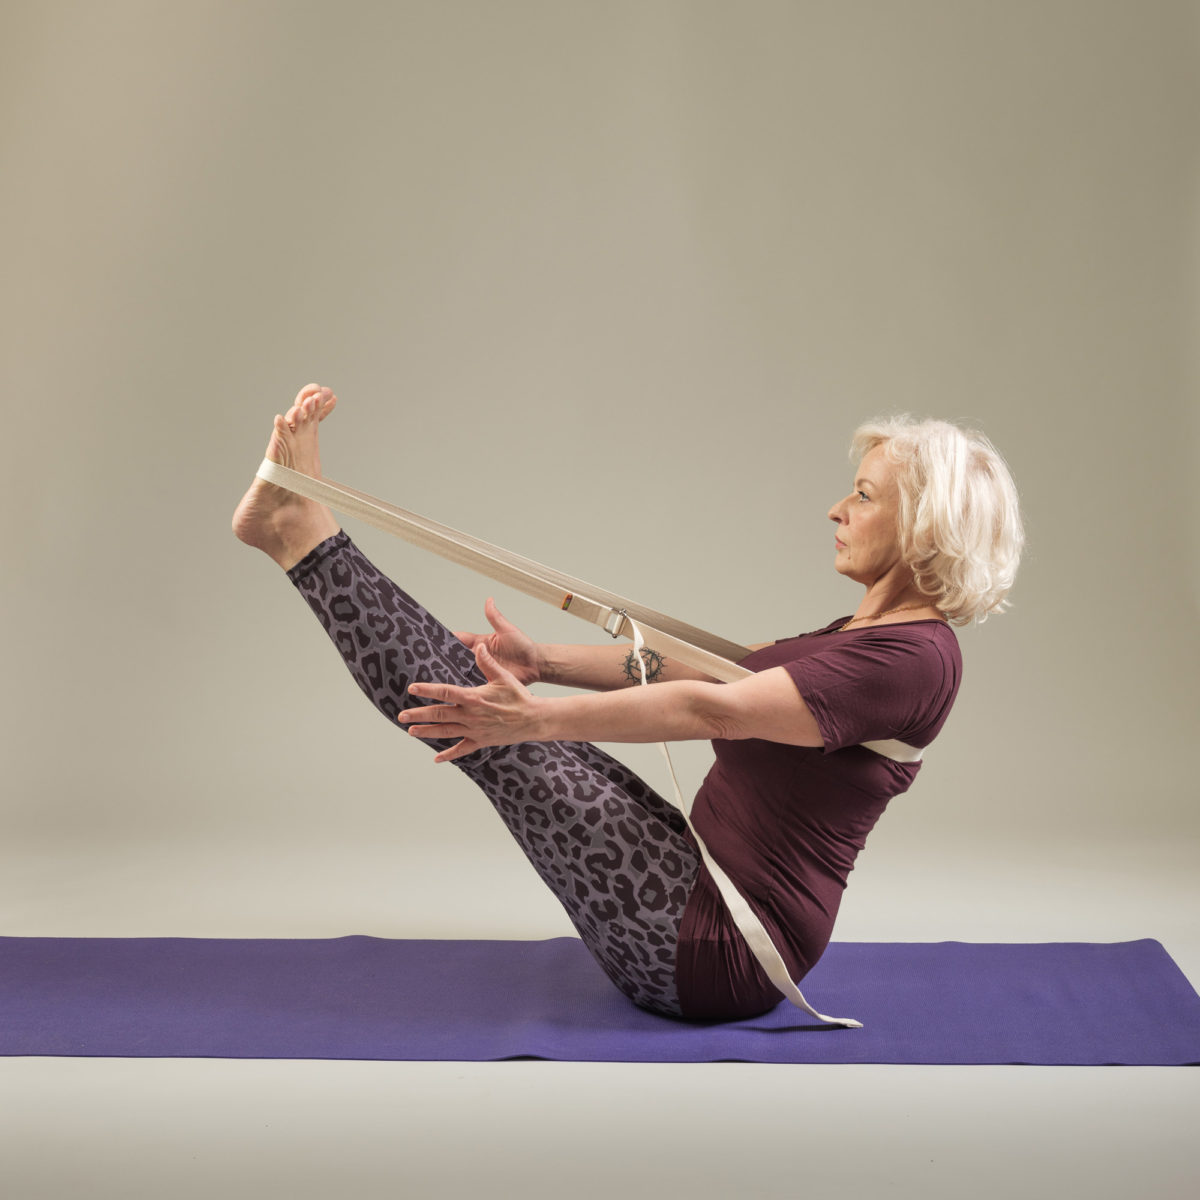
The beauty of this version is that you can find quietness in what can be quite a difficult pose to hold. Your legs will feel light, and the touch of the belt on your back ribs reminds you to lift and open your chest rather than collapsing your lumbar towards the floor.
Fun Fact
The origin of the yoga belt comes after a visit to BKS Iyengar’s yoga institute in Pune, India by some French students for and an intensive study course in the 1970’s. When they arrived, he noticed that their luggage was bound with belts to stop the suitcases coming apart. BKS Iyengar took one of the belts and started to experiment, using it for a variety of options in poses and thus, the humble yoga belt was born.
The Yogamatters Classic belt comes in a range of sizes.
View all Yogamatters Yoga staps here. Take a look at our Pincha Mayurasana with a yoga belt blog post for further inspiration on how to use a yoga belt.